How to Draw Fur easy with this how-to video and step-by-step drawing instructions. Pencil drawing tutorials for beginners and everyone.
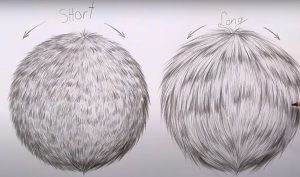
Please see the drawing tutorial in the video below
If you’ve ever tried to draw fur only to have it come out looking flat, lifeless and not realistic, then today is your lucky day. Drawing fur can seem like an impossible task for beginner artists– but don’t worry! In this tutorial I’m going to take you through the process step by step, and you’ll be on your way to drawing realistic fur in no time. Let’s get going.
You can refer to the simple step-by-step drawing guide below
Step 1
The first step when drawing feathers is to decide on the general shape and direction of the feathers. For this example I will draw a simple bunch of hairs with each hair facing upwards as you can see by the arrows.
Step 2
Now that you have sketched out the basic shape of the fur, we need to determine where our light source is. The light in my example comes from the top left corner, which means I’ll add some dark tones to the bottom right of the fur.
Shading is the most important part of the fur drawing process. The trick to drawing feathers is that you don’t actually draw individual hairs. In effect, you are drawing shadows and dark tones around the strand of hair. Highlights in feathers are created by leaving areas blank and dark values blank. This technique is called negative painting, and it is key to creating realistic fur and fur.
Step 3
At this point we will need to add a little texture to the highlighted areas of the feathers. Remember that the highlights should not be too dark, so make sure to paint with light hands and build the lines gradually.
Step 4
At this point you should really start seeing some more realistic looking fur. Continue to create deeper tones where you want the shadows and leave the highlighted areas mostly with no deep values. Try to really use your wrists/elbows when drawing the feathers to keep your lines smooth.
Step 5
The final step to painting the fur is to polish some finer details by darkening the shadows even further and use the eraser tool to gently pull some of the graphite out of your paper to create realistic highlights. than. You can also use your eraser tool to gently remove some graphite from the shaded edge of the fur to create some reflected light for a more realistic look.
