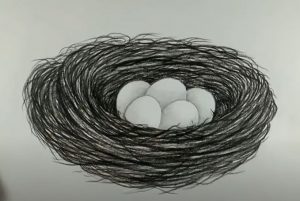
How to draw Bird Nest and Egg easy with this how-to video and step-by-step drawing instructions. Easy drawings for beginners and kids.
Please see the drawing tutorial in the video below
You can refer to the simple step-by-step drawing guide below
Step 1
Start by outlining the rounded top of the nest. Use a series of short, curved lines that meet at jagged points. This gives the nest the texture of grass, straw, twigs and other materials used to build the nest.
Step 2
Continue using a series of short, curved lines that meet at jagged points. Sketch this line style to fully enclose the rounded shape of the nest.
Step 3
Interior structure of the nest. Draw curves using a series of short curves that meet at jagged points.
Step 4
Draw the first egg by sketching a circle. Notice that one end of the egg is narrower, while the other end is wider than the other.
Step 5
Draw the second egg. Again, make one end of the circle wider than the other.
Step 6
Draw the third egg by drawing a curved line between the first two, enclosing a circle that appears to be nestled behind the other eggs.
Step 7
Detail the interior of the nest by sketching curves. Each line must consist of many short, curved lines that meet at jagged points.
Step 8
Delete the instructions from where the nest meets the egg. (Learn to draw a hatching egg.)
Step 9
Continue the nest structure with short lines.
Step 10
Color your home. Do you know? Bird eggs come in a variety of colors, including white, brown, green, pink, and light blue. Some have dark spots on a lighter background. (Learn to draw colorful Easter eggs.)
Drawing, sketching supplies and Painting you may need:
- Assorted Color Sharpie Permanent Markers
- Glitter metallic paint pens sparkle water-based marker pen
- White sharpie extra fine paint markers pack oil based
- mixed media sketchbook drawing pad
- Sharpie permanent markers ultimate cosmic color collection
- Crayons for kids and everyone
- Prismacolor premier colored pencils
- Watercolor pens for painting
- Acrylic colour set for painting
- Paper for drawing and Painting
