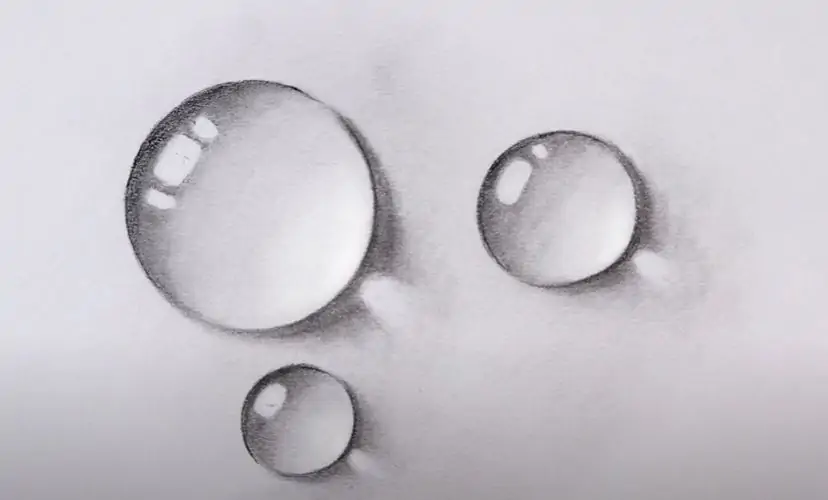
Learn how to draw realistic 3D water drops with pencil in this easy step-by-step tutorial. We will start with simple circles and gradually add shadows, highlights, and smooth shading to make the water drops look realistic and three-dimensional. 3D drawing tutorial for beginners and everyone.
Please see the drawing tutorial in the video below
Water Drop Drawing with Pencil Step by Step
Step 1: Draw the Water Drops

Start by drawing three circles of different sizes. Make one circle larger than the other two to create the basic shapes of the water drops.
Step 2: Shade the Large Water Drop

Begin shading around the upper edge of the largest water drop. Make this area darker and leave three small bright spots to represent reflections of light.
Step 3: Add Shadows and Refraction

Continue shading along the lower edge of the large water drop. Make this area darker while leaving a small bright spot to represent light passing through and refracting inside the drop.
Step 4: Shade the Smaller Water Drops

Use the same shading technique on the two smaller drops. Add darker areas around their edges and leave small highlights to create the appearance of reflected and refracted light.
Step 5: Complete the 3D Water Drops

Finally, smooth out the pencil shading and refine the highlights and shadows. Add soft shadows beneath the drops to make them look more realistic and three-dimensional. Your 3D water drop drawing is now complete!
You can see more 3D drawings: