How to Draw a Warthog easy with this how-to video and step-by-step drawing instructions. Wild animals drawing for beginners and everyone.
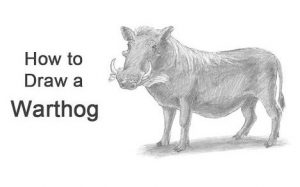
Please see the drawing tutorial in the video below
You can refer to the simple step-by-step drawing guide below
Step 1
Start by drawing Worthog’s head. Create a series of curved lines, starting at the top left of the head. Curl it down, then toward the left pointed cheek. Move the line back in before going down. Bend it out to start making the snout, and where the tusks will go. Curl it down the back and make a bumpy curve for the muzzle. Continue drawing the curve upwards towards the top, slightly to the right to make room for the next tusk.
Step 2
Draw ivory near the end of the shape you drew. They are two curves that meet at a point, and join the head at near-end curves on either side of the nose. On the nose, draw two circles for the nostrils and two lines above the muzzle.
Step 3
Now for the ears! Create a triangle with curved edges for the left ear, adding a curved line on top to make the ear look a bit thick. Then add the curve of the top of the animal’s head, before bringing in the other ear. Two curved lines to start it, then a straight line downwards, followed by a curve to the left and down to form the bottom of the right ear.
Step 4
Next, we can draw Worthog’s eyes! Make an oblong oval for the circle around the eyes and a line near the head to create the eyeball. Add a curved line above for the eyebrows and you’ve drawn the eyes!
Step 5
Now for the first leg. It should start just behind the animal’s snout and work its way down in a gentle curve. The shape is a bit like a trunk with a small root growing out the back. Just below the front foot should go two small triangles for hooves.
Step 6
Draw a small horizontal line, before bending down into a long tree shape and curving like the first leg. Add two triangles for the hooves, then gently draw the line up and back. Now you have two legs!
Step 7
Create your Warthog’s belly by drawing a curve into a rounded, upward curve.
Step 8
Now draw the hair. This can be done by creating a jagged line between the ears, then creating two curves going down and to the right. The bottom line is the shape of the animal’s back, while the top line is the shape of the fur. These two lines should be connected by a jagged line to make it look more opaque.
Step 9
Now for the hind legs! Draw a curved line starting in the middle of the hair you drew and create a hump for the back of the Warthog. It will then descend into another tree-like shape, with two small triangular claws at the bottom.
Step 10
Now, let’s add a bent leg back to the beginning, before going down into two more triangle nails. Add a small spike at the back of the leg to make it look so pretty!
Step 11
We can finally make the tail! Just a line going down, curving behind the animal’s rear hump and ending in a small, slender triangle. And now you’re done! The hedgehog is done!
