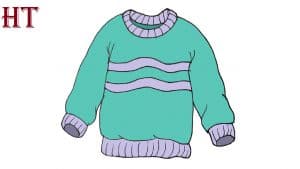
How to Draw A Sweater easy with this how-to video and step-by-step drawing instructions. Simple drawing for kids and everyone.
Please see the drawing tutorial in the video below
You can refer to the simple step-by-step drawing guide below
Step 1
In the first step of the tutorial on how to draw a sweater, we will start with the outline of the shirt. For now, we’ll focus on the hemline of the neckline and sweater sleeves.
Simply use some convex smooth lines to draw these contours as shown in the reference image.
Step 2 – Draw the chest contour in this step
We will continue with the outline for your sweater drawing in this step. For this part, we will focus on the chest part of the sweater.
Once you’ve added this line and it looks like our example, you’ll have the overall outline of the finished sweater. Now we can start adding some inner details in the next few steps.
Step 3 – Start adding some details in this step
Once the sketch is done, we can start adding some details in this part of the tutorial on how to draw a sweater. For this step we will focus mainly on the neck and the edges of the arms and waist.
You can use some curves in the neck hole of the sweater to create a band at the opening there.
You can also use some of the same lines to create the end of the arms, and then finish by doing the same at the base of the sweater. That’s all for this step and you’re ready to move on to step 4!
Step 4 – Start decorating your sweater drawing
In this part of your sweater drawing, we’ll start decorating it. We’ll show you one way you can do this, but in the next few steps you can also design your own if you want!
For our design, we will have two stripes along the center of the sweater. Each stripe will be created using two wavy lines.
As we mentioned, you can also alter the design a bit and can make it completely different by using shapes like square or circle instead.
That’s up to you, and when you’re happy with that, we can move on to some final details in the next section.
Step 5 – Now you can add some final details to your sweater drawing
In this fifth step of the how to draw sweater tutorial, we’ll add some final details to get you ready for the final step.
For these details, just add some short lines for the bands at the neck, sleeves and base of the sweater.
That will do it for the final details, but you don’t have to stop there! Before continuing, you can also add some details of your own if you want.
We mentioned that you can change the pattern of your sweater, but you can do a lot more.
An interesting idea would be to draw a person wearing a sweater. Perhaps you could use a mirror or a photo of yourself to create a self-portrait of yourself in a sweater!
Another option to put your own spin on this image is to create a great background for it. What other background elements or clothing items can you think of to complete this photo?
Step 6 – Finish your sweater drawing with some colors
You have reached the final step of sweater drawing and this is the part where you can have fun coloring in your awesome drawing!
Sweaters can be any color or texture you can imagine, so you can get creative for this step. In our reference image, we used a red and gray color scheme to fill it in, but this is just one of many options you can use.
When it comes to coloring, there’s no wrong way. Once you’ve chosen how you want to color it, you can then have a little fun choosing what art medium you’ll use to finish it off.
Different art media can have different effects, so you have many options for how you can convey the look you want.
If you want bright colors that pop, then you can use something like acrylic paint, crayons, or markers for that look.
Also, watercolors or crayons would be great for a more faded look. These are just a few examples of what you can use, so we can’t wait to see what you choose!
