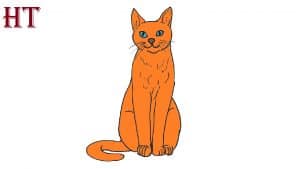
How to draw a sitting cat easy with this how-to video and step-by-step drawing instructions. How to draw a pet for beginners and kids.
Please see the drawing tutorial in the video below
You can refer to the simple step-by-step drawing guide below
Step 1
So let’s start the tutorial on how to draw a sitting cat. Unlike humans, cats are taller when sitting. Try describing this pose with simple geometric shapes. Draw two identical circles and a large, irregular oval, as shown in our reference.
Step 2
We connect the two figures above using two vertical lines. You can then add the outer contours of the ears, which look like a pair of triangles. Finally, draw the outline of the tail, which is below the largest shape from the first step.
Step 3
Now let’s draw our cat’s face. Use small, smooth curves for this. Try to avoid putting too much pressure on the pencil during this step.
Step 4
In this step, we will detail the parts of the cat’s face. To form the final eye cut, close the two curved lines from the previous step. Inside each eye is a long, narrow pupil. The cat’s nose looks like a small inverted triangle. There are three circles under the nose.
Step 5
We hope that you did not get tired of this tutorial on how to draw a sitting cat. Let’s add the inner contours of the inner parts of the pillow. It looks like a pair of triangles. Also, with the help of scanning short straight lines, we outline our cat’s mustaches.
Step 6
To make our drawing more complete, let’s sketch our cat’s fingers. It looks like small circles. Well, now our cat looks much cuter and realistic, doesn’t it?
Step 7
So it’s time to remove all unnecessary construction lines from previous steps. Without this action, the cat’s body parts would look transparent. We will also make the contours of the body and face clearer and more complete.
Step 8
Any drawing looks much cooler with drop shadows. Therefore, in this step, we will add light shadows inside the eye contour, under the nose, lower body and tail. Do not forget about the highlights, located in the contour of the eyes.
Step 9
In this step, we have finally eliminated all the mistakes that could have been made during the entire drawing lesson and perfected the final strokes.
If this drawing tutorial on how to draw a sitting cat was helpful, please let us know about it. Your comments and criticism are very important to us. Your comment really helped us understand which direction our drawing lesson should be directed.
