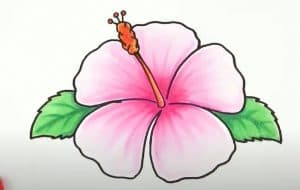
How to Draw A Hawaiian Flower easy with this how-to video and step-by-step drawing instructions. Flower drawing tutorial for beginners and kids.
Please see the drawing tutorial in the video below
You can refer to the simple step-by-step drawing guide below
Step 1
For the first step of the tutorial on how to draw a Hawaiian flower, we will start with a single petal.
These petals will have quite a bit of detail to them, and will be formed into a circle with a narrower tip towards them. This narrow section will be where the petal connects to the center of the flower.
Finally, you can finish with some rounded lines all over the petal to give it more texture detail.
After you have recreated the petal as shown in the reference image, you are ready to proceed to the next step!
Step 2 – Draw some more petals
Now that you have created a petal for your Hawaiian flower drawing, you should have no problem drawing a few more petals!
These will be quite similar to the previous one, but the size will be slightly different.
The one between the others will be the smallest and the reference image will guide you in the position and size of these petals.
Step 3 – Add another petal and style
We will be adding two elements in this step of our tutorial on how to draw a Hawaiian flower. First, we will add another petal near the top of the flower.
Then we will add a long and thin column from the center of the flower. This column is called a style and you can draw it using some thin, curved lines going up from the center.
This will end up in a bulbous section drawn with some small circles.
That’s all there is to do in this step, so let’s move on!
Step 4 – Now add the last petal and the first leaf
In the fourth step of this Hawaiian flower drawing, you will add the final petal to the picture. This last petal will fill in the last space left between the other petals, as shown in our reference image.
Then, when you have all the petals, we will draw the first leaf. You can use some curves with some sharp points for the edges of the leaf, then add some veins to it to complete it.
Step 5 – Draw another leaf for the Hawaiian flower
Using what you learned in the previous step of this tutorial on how to draw a Hawaiian flower, you can draw another leaf for the tree.
This leaf will be very similar in structure to the other, but on the other side of the flower, almost like a mirror image.
After you’ve drawn that leaf, we’ll just have a few final details to add in the next step!
Step 6 – Now draw the last leaf of the Hawaiian flower
It’s time to finalize the details before you add some amazing color to your Hawaiian flower painting. The main thing we will add will be a final leaf for the flower.
However, this card will be quite different from the others. Instead of a large and sturdy leaf, this leaf will have several sections to its edge that you can draw with some straight and curved lines.
If that sounds confusing then the reference image will show you what it should look like!
Then your drawing is done and you’re ready to go! Before moving on to the final step, you can also add some details of your own to wrap up this step.
There are many ideas you can use to do this, from incorporating the flower into the background or even painting more flowers next to it.
You can do this by drawing some more Hawaiian flowers according to what you have learned, or you can also draw some more of your favorite flowers. How would you complete this drawing before the last step?
Step 7 – Complete your Hawaiian flower drawing with some colors
You’ve done a great job with this Hawaiian flower drawing tutorial, and now you can finish it off with some awesome colors!
In our reference image, we used some red and green for the flower, but this is just one of many options you can use. These incredible flowers can come in a variety of colors and shades, so that gives you plenty of options when it comes to adding some color to it.
Choosing colors is only part of the fun, as you can also experiment with different art mediums. Watercolor paint can be great for this type of painting, as it gives a nice soft look to the image.
However, whatever medium you use will look great, so make sure to use whatever art tool you love to get it done!
