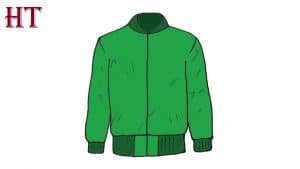
Jacket Drawing Easy with this how-to video and step-by-step drawing instructions. Simple drawing for kids and beginners.

Please see the drawing tutorial in the video below
You can refer to the simple step-by-step drawing guide below
Step 1
Each item can be represented as simple geometric shapes. First, draw a jacket with a simple rectangle that will represent the body.
Step 2
So it’s time to depict the sleeve of the jacket. Recall that in all initial stages you should use very light, almost transparent lines. As a result, you will get such a sketch.
Step 3
In the upper part of the drawing the coat depicts a trapezoid of clothing. Now create the cuffs at the bottom of the jacket and on the sleeves.
Step 4
At the top, depict the collar of the jacket. We decided to make a stand-up collar, which is often found on bombers. Next, with the help of a long line to depict a zipper.
Step 5
Now we need to clean the drawing of the jacket from unnecessary lines. Therefore, it’s time to get an eraser and wipe off the sub-principles to get a clean work of art.
Step 6
On all cuffs, including the collar, depict horizontal lines. Also, make creases where the fabric stretches or shrinks. Also, don’t forget to add a seam in the shoulder area.
Step 7
So if there are extra lines, remove them. Make the picture cleaner and more aesthetic. Next, mark out your coat drawing with a pencil or bold ink. As a result, you will get such a beautiful coat drawing.
Step 8
So now it’s time to paint the coat. We decided to color it army green. But you’re free to paint the jacket in a brighter color, whether it’s green, red or yellow because your artwork doesn’t have to be an exact copy of the work the artists do. Easydrawingart.com artist drew.
So we’ve finally reached the end of our how to draw jacket tutorial. If you want to expand your knowledge in the area of clothing design, also try visiting other articles from the Clothing category.


