How to Draw HANDS by pencil for beginners with this how-to video and step-by-step drawing instructions. Pencil drawing tutorial for beginners and everyone.
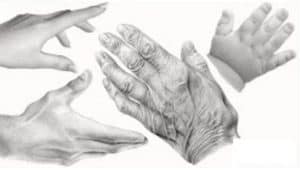
Please see the drawing tutorial in the video below
You can refer to the simple step-by-step drawing guide below
Step 1: Create a palm shape
How to draw hands step 1 Use an HB pencil to draw the rectangle a bit longer than the square. Create slope at the top. The right side of the curve will drop much lower than the left because we are drawing the back of the right hand. The tapering to the right of the rectangle is good.
Step 2: Draw five circles
how to draw a 2Draw step 4 arms above the same with an even distance between them. These are knuckles. Add a fifth circle for the thumb on the bottom left about 4/5 lines down.
Step 3: Measure and draw your fingers
Hand drawing Step 3 To determine the length of each finger, measure the length from the wrist to the knuckle and duplicate the number. Dotted lines mark the maximum finger height. Our fingers have different lengths and since the middle finger is the longest, we will use it as a reference to find the height of the remaining 3 fingers. To do that, draw a curve similar to the first one drawn in step 1.
Step 4: Find the matching for each finger
How to draw hands Step 4Now we have all 4 fingers, time to locate each joint. Add 2 markers to the middle finger, about 1 quarter of the way down each time. Using these markers, draw 2 more curves. We now have waypoints for general locations! Wasn very bad, right? Please note that these are only loose measurements for simplicity.
Step 5: Draw a circle at each joint
How to draw by hand Step 5 For each finger, draw two more circles. Each finger should have 3 circles from small, medium to large from top to bottom.
Step 6: Draw the thumb
How to draw by hand Step 6 For the thumb, draw a curve from the bottom left circle. The height of the thumb will vary depending on the distance it is spread out. Measure the length of your thumb and draw a circle at halfway point. Add another circle in the middle.
Step 7: Sketch around the hand
How to draw by hand Step 7 Make an outline around the structure. Increase fat between each finger joint for chubby hands or reduce fat while making joints stick out for thinner hands. Humans have some network in the middle of each finger, so make sure you connect each finger to the web. Make sure they are not too low. They should be above the knuckles drawn in step 2. Now that we understand the ratio and how to build a basic hand, let practice drawing different hand gestures.
Hand image for reference drawing
Download and use the hand images below for your reference! You may find it difficult to use the measurement system for certain gestures. In this case, pay close attention to the measurements and remember to make use of the curves when drawing your finger. If you practice enough, you will be able to sketch them without using the tutorial or better yet, can visualize and draw any gestures! Understanding muscles, tendons and adipose tissue will help add a realistic layer to your hands.
