How to draw a volcano easy with this how-to video and step-by-step drawing instructions. Easy drawing for beginners and everyone.

Please see the drawing tutorial in the video below
You can refer to the simple step-by-step drawing guide below
Step 1
Start by drawing two diagonal lines. The lines should be inclined towards each other at the top. This outlines the slopes, or sides of the volcano.
Step 2
Connect the lines at the top by a short curve. This shows the crater, from which the lava erupted.
Step 3
Connect the diagonal lines at the bottom using a wavy, scalloped line. You now have a complete outline of the volcano’s shape.
Step 4
Draw lava flowing from the top of the volcano with a long curve. This line will double itself again and again, forming a “U”-shaped lava line of various sizes.
Step 5
Delete the links from the lava.
Step 6
Draw two curves extending from the top of the volcano. This outlines the smoke and ash that the volcano erupts into the air. Add details to the beam by drawing some shorter curves between the first.
Step 7
Draw smoke clouds on top of the beam. Do so by using a series of short, connected “U-shaped lines”. Smoke details by drawing a series of “U-shaped” lines, connected inside the smoke cloud.
Step 8
Give volcano some ground to stand on. Draw some wavy lines on each side of the volcano to indicate the horizon, and perhaps some additional mountains in the background. Surround an unusual shape in front of the volcano using a long curve. This form can be a rock, or it could be a lake – up to you!
Step 9
More details for volcanoes.
Step 10
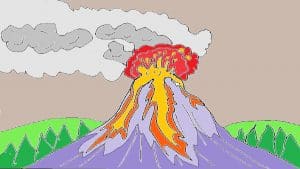
Paint your volcano. In our example, we covered a barren, brown wasteland, around the volcano, with gray smoke and bright red and yellow lava.


