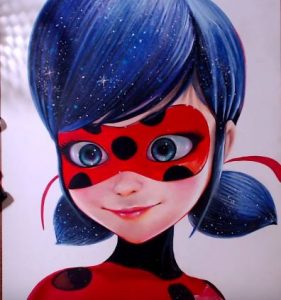
How to draw Miraculous Ladybug (Marinette) from the TV animation series ‘Miraculous: Tales of Ladybug & Cat Noir’ with this how-to video and step-by-step drawing instructions. Pencil drawing tutorial for beginners.
Please see the drawing tutorial in the video below
You can refer to the simple step-by-step drawing guide below
Step 1
Start by sketching the face of the ladybug. Use a long curve and notice the gentle points of the chin.
Step 2
Sketch of ladybug’s hair. Use a series of overlapping curves to outline the top of the hair. Then, use pairs of curves that meet at sharp points to draw the bangs at the top of the face.
Step 3
Use pairs of curves that meet at the points to draw hairs hanging in front of the ears on either side of the face.
Step 4
Draw ears with curves. Then stretch the pairs of lines evenly spaced out of the face. Allow these to meet at sharp points. These are the ends of the ribbon tied on the mask.
Step 5
Extend a pair of curves downward from the face to form the neck. Connect them at the bottom using a curve.
Step 6
Extend pairs of curves outward from the neck to form the shoulders. Outline body with additional curves. Then draw round spots all over your shoulders and chest.
Step 7
Draw a horse tail hanging down each side of the neck. Sketch each ponytail using a pair of curves that meet at a point. Then hair texture with curves.
Step 8
Hair texture on the top of the head with curves. Then use a long curve to outline Ladybug’s mask. Use the curves to outline the eyes, slightly pointed at the corners. Use short lines to refer to eyelashes. Then consist of three smaller circles. The ball between the two smallest ones, only the pupils.
Step 9
Draw circles and part of the circle in the mask.
Step 10
Coloring ladybug. She has dark blue hair and wears a red outfit with dark spots.
