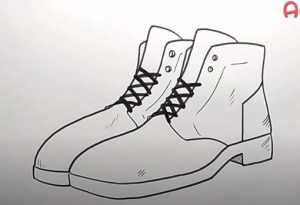
How to Draw a Boots easy with this how-to video and step-by-step drawing instructions. Easy drawing tutorial for beginners and kids.

Please see the drawing tutorial in the video below
You can refer to the simple step-by-step drawing guide below
Step 1
Start by drawing a cylinder. To draw a cylinder, start with a set of vertical, parallel lines. Connect the lines with a curve at both the top and bottom. Then, surround an oval at the top using an additional curve. You now have a three-dimensional cylinder.
Step 2
Using the cylinder as a guide, add details to the contour of the boot. On each side of the cylinder, draw a curve going in and out of the cylinder. Draw a small, rounded triangle at the base of the cylinder to indicate where the bottom of the shoe touches the heel.
Step 3
Using a long, curved line, outline the toes. Note the blunt point formed where the sole and top of the shoe meet.
Step 4
Erase guides formed by cylinders.
Step 5
Start the second warm-up by drawing another cylinder. Since this boot is partially hidden by the first one, you can use a straight line, a vertical line, and two curves to wrap the shape.
Step 6
Draw curves on each side of the cylinder to detail the contour of the boot.
Step 7
Use a long, curved line to outline the toe.
Step 8
Erase any guide lines to create a clear contour for your boots.
Step 9
Details of your straps. For each strap, surround a curved rectangle using the short and curves. Draw a long, curved line parallel to the bottom of the boot, forming the sole. Finally, draw a curve over the tip of the toe.
Step 10
Color your boots. Will they be brown, masculine workwear? Or brightly colored rain boots? Be creative, because the choice is yours.


