How To Draw A Griffin (Gryphon) with this how-to video and step-by-step drawing instructions. Pencil drawing tutorials for beginners and everyone.
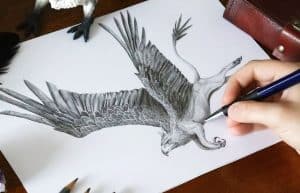
Please see the drawing tutorial in the video below
You can refer to the simple step-by-step drawing guide below
Step 1
In this step, draw instructions that will help you sketch the gryphon more easily. Start by drawing a rounded head with a long neck that curves down the back ending at the tail. Next, draw a waving line for the wings, then two circles inside the donor body, the torso. Legs and feet are the next thing to be drawn.
Step 2
You can now draw a border around the shapes you created in step 1 to create the actual image of the gryphon. As you can see in the image above, the beak is drawn halfway inside the circle for the head. Right above that sketch with pointed ears and a square head. Below draw the clawed paws in the front and the limbs of the lion in the back. Finish the step with the tail.
Step 3
Now in this step you can draw the wings relatively easily. The same goes for drawing any bird’s wings just bigger. Trim the tips and wait until the next step to actually fill in the remaining hairs. Move to the gryphon’s face and draw eyes and holes in the beak. Brush the fur at the neck and down the elbows of the front legs. Paint on the hind legs in the back and add some fluff detail to the hind legs in full view. Draw the claws on the claws on all paws before moving on to the next step.
Step 4
This is where you can start filling in the feather detail of the gryphon’s wings. Take your time because you want them to look realistic. Swipe up the nape and down in the direction of rotation. Detail the front legs by adding lines to make the legs look like eagle legs. Wrap up what you need to do in this step by viewing the image and continue.
Step 5
This is a short step just as you have completed the basic feathering in the wings. Again take your time and when you are satisfied move on to the next step.
Step 6
Again, a simple step consisting of just the tail feathers. After you’ve done that, erase all the guidelines that you created in step 1 and clean your drawing removing the outline marks on the pad. When you’re done finalizing your sketch, move on to step 7.
Step 7
Here’s what you should end up with when you’re done. All that’s left to do is color him or her and let your imagination run wild.
