How to Draw a Clouded Leopard easy with this how-to video and step-by-step drawing instructions. Easy animals to draw for beginners and everyone.
Please see the drawing tutorial in the video below
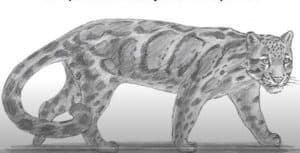
You can refer to the simple step-by-step drawing guide below
Step 1
Start drawing your Clouded Leopard by drawing a curved arch for the head. The curve should turn into a snout, before turning down to make the end of the nose, and bent to the right to make cheeks. From the top of the mouth, another line should be taken down, then bent to make the lower jaw.
Step 2
For facial details, draw two lines to a point in the upper left of the head for the left ear. Draw an arc on the right side for the right ear and place a teardrop shape with a flat bottom for the eyes. Then place a fork over the mouth to make the nose, and a few to make the beard on the sides.
Step 3
Now painting the body. This will be a curve that starts at the back of the head, sloping down and to the right while slightly curved to create the hump of the back. Then it should bend down to make the rest of the back.
Step 4
Now draw the chest and forelegs. Draw a slant to the right, the line down from the back of the chin. This line should be curved backwards, but not drawn too far. Then add a straight line down from above the curve you drew on the chest, which will bend out, then bend around to make the toes of either foot. Then draw some points while making sure to leave negative space for the other leg.
Step 5
Next we draw the other leg! Place two oblique lines left and down starting to distance from each other and moving closer together. At the bottom, the frontline should go around to make legs. Add two more loops to add the toes and connect one of the loops to the back line. Now add points on the leg.
Step 6
Draw a longer line on the back of the leg, go up and to the right. Then draw a line going down from the back and curve to the left to make a straight line. Then put in a circle to indicate the existence of legs and feet on them.
Step 7
Now draw the tail! It should be thick and made of two lines starting at the back of the Leopard, bent once in any direction you want. The lines should respond with a wide rounded curve. Be sure to place all points along the tail too.
Step 8
Now add a lot of points all over the body, and you’re done! You drew your Clouded Leopard. You can color the panther.


